NSEC21 Goldsmith's Guild Part 3 - Tue, May 25, 2021 - Alexandre-Xavier Labonté-Lamoureux
How NOT to sample sound | Misc | Nsec21
Goldsmith’s Guild Part 3
This challenge was part of a forensics track where data had to be restored from PCAP files in order to find flags. This one was different; we were given a bitmap which contained a waveform’s graph. The waveform had to be converted back to audio so we could listen to it and find digits used for a door’s keycode. Although the image was high resolution, it wasn’t high resolution enough so we could get the original audio back and have something that was clearly audible.
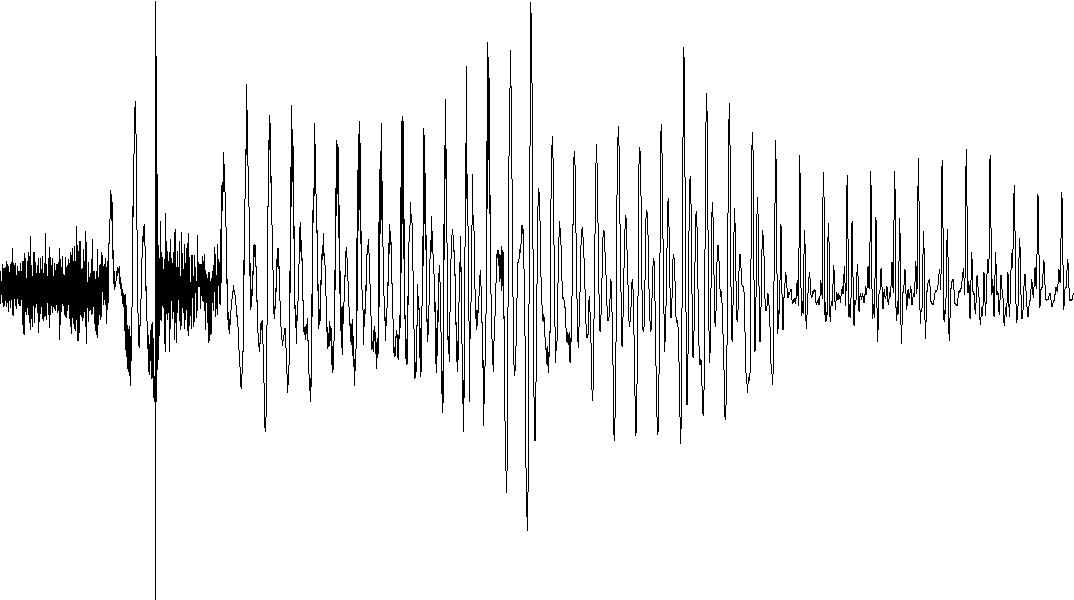
The sound wave (pictured below after being cleaned up) only contains 6976 samples for about two or three seconds of audio. For comparison, the modern standard for audio is 44100 samples per second.

If you are already familiar with “sound”, sampling sound from a waveform’s image is pretty trivial, although impossible to do accurately because of the loss of data.
The basics of sound
A waveform, such as the one we were given, represents an audio signal travelling through time. In this case, the vertical axis would be the amplitude and the horizontal axis is the amplitude changing through time. The number of changes of amplitude in a second is the sound frequency, in hertz (Hz). So, the waveform is basically the evolution of vibrations through time.
When you play a sound, your speakers vibrate at this frequency and the change of amplitude through time creates a change of air pressure. Your ears each contain an eardrum that will vibrate at this same frequency as the air pressure changes.
If you’ve ever heard the humming sound of electric current and saw what it looks like on an oscilloscope, then you may realise the link between a sound and its visual representation as a waveform.
A soundly recovery
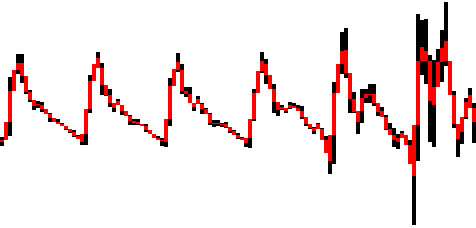
The simplest way of restoring the audio is to sample a point for each change of amplitude on the waveform’s graph. We can compute an average on each pixel column. Here’s an approximation of the restored audio samples represented in red.

The corresponding code:
from PIL import Image

img = Image.open("soundwave.png")
pixdata = img.load()
output = open("saveform.raw", "wb") # this file can be imported in Andacity as 8-bit unsigned audio

samples = 0
lowest = img.size[1]
highest = 0

print("image resolution: " + str(img.size[0]) + "x" + str(img.size[1]))

# find the highest and lowest values from the entire audio clip
for y in range(img.size[0]): # horizontal iteration
	for x in range(img.size[1]): # vertical iteration
		if pixdata[y, x][0] < 127: # this is a grayscale image
			if x > highest:
				highest = x
			if x < lowest:
				lowest = x

# normalization factor between 0 and 255 because original sample is between 0 and 600, we get 8-bit samples
diff = (highest - lowest) / 256

for y in range(img.size[0]): # horizontal iteration
	# to compute the average
	add = 0
	count = 0

	for x in range(img.size[1]): # vertical iteration
		if pixdata[y, x][0] < 127:
			add += x
			count += 1
	# average
	point = (add / count)
	# normalize
	point /= diff

	if point < 0:
		print("error: " + str(point) + " too low")
		quit()

	if moy > 255:
		print("error: " + str(point) + " too high")
		quit()

	# writes the byte to the raw audio file
	output.write(bytes([int(point)]))
	samples += 1

print("samples read: " + str(samples))
Although this seems to be a good enough approximation and produces the audible voice that we’re seeking, this kind of approximation fails to produce something relevant when the difference of amplitude between samples is rather small. We’ll miss any subtility in the sound as the audio samples are not restored to their full extent.

The sound resulting from this script (below) was slowed down in Audacity so the pronunciation is easier to understand. Most people understood “seven seven seven six three oh nine nine” or “seven seven seven six three oh one nine” at this point. We were unable to validate the codes 77763099 and 77763019.

But wait, can we make it even better? It sounds muffled and the “three” sounds a bit weird. (it actually sounded weirder during the CTF, it was way worse due to bad audio clamping in our script).
The first syllable starts with highly compressed amplitudes and is followed by a huge spike, then by compressed amplitudes again, before it becomes “normal”.

Since we were unable to validate the flag, we created a new algorithm to improve the audio quality. The following code recreates the audio, not using an average value, but the high points and low points of each column of pixels.
from PIL import Image

img = Image.open("soundwave.png")
pixdata = img.load()
output = open("saveform.raw", "wb") # this file can be imported in Andacity as 8-bit unsigned audio

samples = 0
lowest = img.size[1]
highest = 0

print("image resolution" + str(img.size[0]) + "x" + str(img.size[1]))

# find the highest and lowest values from the entire audio clip
for y in range(img.size[0]): # horizontal iteration
	for x in range(img.size[1]): # vertical iteration
		if pixdata[y, x][0] < 127: # this is a grayscale image
			if x > highest:
				highest = x
			if x < lowest:
				lowest = x

# normalize between 0 and 255 because original sample is between 0 and 600, we get 8-bit samples
diff = ((highest - lowest) / 256) + 0.02 # this time we add an epsilon to avoid overflows

for y in range(img.size[0]):  # horizontal iteration
	# reset vars
	local_highest = lowest
	local_lowest = highest

	for x in range(img.size[1]): # vertical iteration
		if pixdata[y, x][0] < 127:
			if x < local_lowest:
				local_lowest = x
			if x > local_highest:
				local_highest = x

	# lowest point
	point = local_lowest
	# normalize
	point /= diff

	if point < 0:
		print("error " + str(point) + " too low")
		quit()

	if point > 255:
		print("error " + str(point) + " too high")
		quit()

	# writes the byte to the raw audio file
	output.write(bytes([int(point)]))

	# highest point
	point = local_highest
	# normalize
	point /= diff

	if point < 0:
		print("error: " + str(point) + " too low")
		quit()

	if point > 255:
		print("error: " + str(point) + " too high")
		quit()

	# writes the byte to the raw audio file
	output.write(bytes([int(point)]))
	samples += 1

print("samples read: " + str(samples))
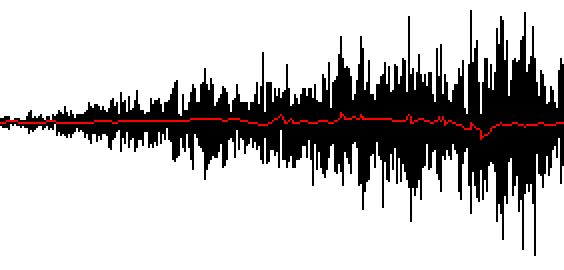
We now have a complete coverage of the audio data. This is basically what is being recreated. (note that all you see is red because the black waveform is completely covered)

Way more accurate than computing averages, isn’t it? The sound was shadowed by a high-frequency sound, so it was improved using Audacity’s noise removal and compressor. The end result sounds pretty good. Exporting it from Audacity was an issue because it doesn’t support exporting low sample rates sounds very well, thus it was recorded from the computer’s internal audio so you can fully appreciate its crispiness.
Now there’s no doubt that we hear “seven seven seven six three oh one nine”, but despite the improved audio quality, this is still the same code that didn’t work earlier.
We knew that the “three oh” was what caused trouble when 77763019 didn’t validate. It’s so ambiguous, it even sounds like the word “trillion”, so we tried 777600000000000019 as a combination to see if it might work. (that’s twelve zeros!)
We spent a lot of time trying to improve the audio, although we were doubtful that it could be improved further because the audio had already been improved as much as it possibly could. There wasn’t anything that we felt would make it more accurate.
Eventually, our teamate Barberousse was able to understand 7776019 thanks to his keen ears. This is logicial, as “zero” is the only digit that ends with the sound “oh” and the sound “three” could pretty much be a destroyed “zee” sound. (perhaps due to the sample rate that we’re dealing with)
It was a relief when the flag validated because we thought 77763 were the correct first digits and we scrambled to find the correct combination for the rest of them. Nobody else would have thought that “three-oh” was in fact “zero”. We unfortunately spent a lot of time guessing the correct combination.
The flag was flag-alexia_7776019